Building BIG - Wood Framed RC Model L-1011 Airliner | Part 3 - Empennage
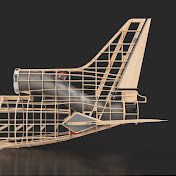
The long awaited part 3 of the wood framed RC L1011 Scale Model Airliner Kit is finally here. Working with the ply wood that was cut on my laser machine makes assembly easy and precise.
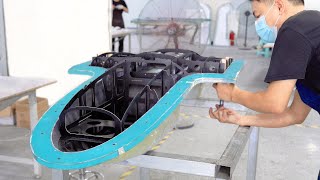
In this RC build episode, I assemble my own CAD designed airliner tail section's wooden frame complete with 3D Printed Molds for the Rudder and SDuct, engineering grade composite 3D printed parts, and Carbon Fiber Casting with Epoxy Resin using the molds to create the light wight duct for the plane's iconic engine number two and the rudder.
This section of the model has been a big challenge, from the weeks of CAD design work to testing printing parts, different FDM filaments and creating countless prototypes. There were some interesting engineering challenges as well regarding the actuation of the rudder and its servo placement. The biggest challenge was the horizontal stabilizer (Stabilator on the L1011) and ensuring 100% synchronized movement. This was accomplished with the use of drive shafts, UJoints, and precision ball bearings. In this video, the drive shafts for the stabilator were printed from nylon with a stainless steel core, however, upon further testing, the shafts in the production airplane kit will be milled from aluminum which will prevent premature wear on the shafts which could introduce slack.
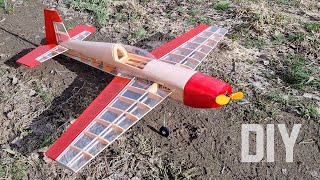
A final note. Using the laser makes the wood working part easy, but there are still some tweaks that need to be made. This build is rooted in the traditional model airplane construction where you're working with plywood and balsa wood to meticulously cut out each part. Using my 100w laser makes the process of framing and joining much faster and more precise. A modern twist on an "old" school building style.
Close Up Photos & More Airliner Build Info:
https://www.rccad2vr.com/l1011model...
Reserve an L1011 Kit:
https://www.rccad2vr.com/trijetkitp...
Servos Information:
https://www.rccad2vr.com/rcairplanes...
Thank you to FrSky for providing these for this build!
The frame is made of 3mm birch ply wood which was laser cut on my 100 watt CO2 laser.
The 3D printed parts were printed using the Raise 3D Pro2 and are made from the following materials:
The black parts seen in this episode are printed out of carbon fiber nylon for durability and rigidity.
Taulman 910 alloy was used for the pins and stabilator horn. (This will be swapped out in production for milled aluminum parts)
Featured in this build are the FrSky HV5403 & BLS5405H servos
0:00 Introduction What's this Video About
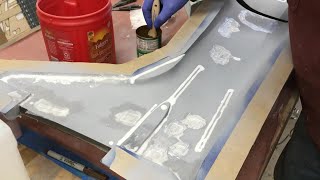
0:59 Post Processing 3D Printed Rudder Mold
1:56 Surface Preparation of Rudder Mold
4:28 Carbon Fiber Wet Layup Rudder
6:18 Horizontal + Vertical Stabilizer Wooden Frame Assembly
9:09 Formers Laser Cut Wood Assembly
9:55 3D Printed Stabilizer Mount with Ball Bearings
10:34 Turbine or EDF Mount & Housing
11:29 Horizontal Stabilizer with 3D Printed Root
12:10 Carbon Fiber Rudder Joining
12:42 SDuct Preparing 3D Printed Mold
13:38 SDuct Carbon Fiber Wet Lay & Vacuum Bagging
16:35 Epoxy Joining Carbon Fiber Duct Halves
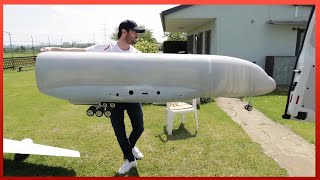
17:21 Installing Carbon Fiber SDuct
17:58 Installing Horizontal Stabilizer
18:59 Installing Rudder
Visit: https://www.rccad2vr.com
Aviation Fans, Let's do this!
Follow on:
TikTok: / rccad2vr
IG: / rc.cad2vr
Twitter: / cad2vr
Pinterest: / seafuzz
Reddit: / rc_cad2vr
#rcairplane #aviation #build