Build a Private RV Wi Fi System with a NanoStation u0026 AirCube AC
Tutorial: Building a High Power Private WiFi Network For Your RV for just over $100! Updated from 2014... READ NOTES BELOW!
Tutorial Start: • Build a Private RV Wi Fi System with ...
Configure NanoStation M2: • Build a Private RV Wi Fi System with ...
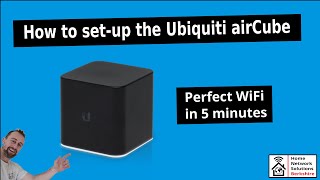
Setting Up AirCube: • Build a Private RV Wi Fi System with ...
Full Blog Post: https://outsideourbubble.com/builda...
Ubnt AirCube FIRMWARE Link: https://www.ubnt.com/download/accesso...
What can we say, we all would like a much better connection to an RV Parks WiFi. For at times, you just can’t reach based on where you are parked or you can not stay connected. It also would be nice to have our own internal private WiFi setup in our coach or RV for all our devices to connect to. Updated version of my popular tutorial from 2014.
You will not only have a much more powerful connection to a parks WiFi over a longer distance, but you will always connect to your own private WiFi in your RV so you never need to connect to another SSID for each device. This also means you will be able to connect your wireless printer and print to it any time. (Just leave the setup plugged in.)
You NEED to know how to change your Windows network card from DHCP to Static IP and back again to do the configuration. Here is a search to help you...
http://lmgtfy.com/?q=How+to+change+to...
What is needed....
Ubnt NanoStation M2 – This is the directional antenna and powerful radio all built into one nice package. It is made by Ubiquiti which is a carrier grade company. As such, it is not as consumer friendly with wizards and the like, to set them up. Do not let that scare you however, as once it is setup, which I walk you through, you will be good to go. (NOTE...You may see an M5 unit, this is NOT newer or more powerful, it is actually a different frequency being 5Ghz vs 2.4Ghz which the M2 is. All RV parks will use 2.4Ghz with only new WiFi installs offering both 2.4Ghz & 5Ghz. NOTE #2...DO NOT purchase the NanoStation AC AirMax radio as the Ubnt AirMAx AC Radios can only connect to other Ubnt AirMax AC products.)
https://amzn.to/3nrnLS2
Ubnt AirCube AC – This is also made by Ubiquiti and is a very little wireless WiFi router. This is DUAL BAND 2.4Ghz or 5Ghz. This is actually what all your devices will connect to to talk to each other and the Internet. It may be small, but can cover your motor coach or RV without an issue. Best part…it’s low cost and it uses the same power supply as the NanoStation. This makes for a clean setup.
https://amzn.to/2VbtoFl
OR the AirCube AC (or ACB) Dual band router, runs at 2.4 & 5 Ghz...
https://amzn.to/3sZNdiD
Two Network Cables – You will need two (2) of these in order to set this up, but will end up using just one when we are done. I recommend shielded cables and that is what I linked to. If you already have network cables, then you are all set. If not BE SURE to order TWO.
https://amzn.to/2xhBjG9
….Optional….
Ubnt NanoStation M2 – A more powerful model of the Loco M2 listed above with double the antenna range for hard to reach access points in a park. (It is also double the height do to the large antenna.)
https://amzn.to/2xbHPib
NanoStation Window Mount – A handy window suction mount for your NanoStation. Great for windshields or other areas as the NanoStation is usually poll mounted outside. (But we are using it inside.)
https://amzn.to/2xfDTfD
Can't find them on Amazon...Try eBay...
NanoStation M2 Loco on eBay: https://tinyurl.com/34npk8hx
AirCube AC on eBay: https://tinyurl.com/s6v4e6zk
FOR AFTER ALL IS DONE...QUICK CONNECT CHEAT SHEET....
1) Connect to your WiFi SSID.
2) Open web browser and go to: http://192.168.2.1
3) Put in the user name and your password. User name = ubnt Password = What you made it.
4) Click on the WIRELESS tab.
5) Click on SELECT
6) Find the Access Point you would like to connect to. (The park or your own data device.)If there are several with the same SSID name you want to connect to, then select the best signal. The first number in the Signal column you want to be closer to zero. 55 is better than 75.
7) At the bottom click LOCK TO AP.
8) If the Access Point requires a password *, enter it in the bottom area. (The park would have supplied one if needed. Or the one for your own data device.)
9) Bottom Right of the screen click CHANGE.
10) Top of the screen click APPLY.
In under 30 seconds, you should see the antenna lights light up and then you should have access to the web. :)
Dealing with Captive Portal or “Agree” Pages: Some parks require you to “agree” or login with a user name and password before you have access. So once you connect to the park with the NanoStation, while on your WiFi network, the first time you open your web browser the “captive portal” page will come up asking you to agree or log in. Once you do, the portal will note the MAC address of the NanoStation and then allow access to anything on your local WiFi network.