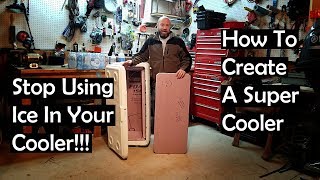
6 Genius Cooler Hacks

This rotomolded cooler tested off the charts : https://amzn.to/2xOjfEw
Super Charge Your Camping Cooler
6 Great Cooler Hacks
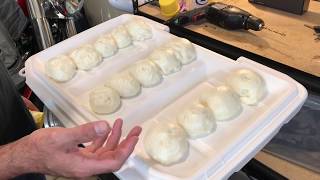
SUPER POLAR BEAR TUBES
You may know a polar bear tube is a PVC pipe with water inside it and the ends sealed. You store them in the freezer and put them in your cooler when it’s time to go. They are a reusable, spacesaving, highefficiency, nomess solution to keeping your food cold while camping. You can make SUPER polar bear tubes by adding ½ cup salt per gallon to the water in those tubes. The salted water freezes at a lower temperature so the ice in the tubes lasts longer.
To make your own Polar Bear Tubes, measure the internal dimensions of your cooler and determine if you want the tubes to run the long way or the short way in the cooler – you may want some of each. Also measure the internal dimensions of the freezer where you’ll store the tubes when not in the cooler! You want them to fit easily in the freezer, too.
Cut PVC tubes one inch shorter than the length you measured. Use either 1 ½inch or 2inch PVC pipe. Remember, the larger the mass of the ice inside the tube, the longer it will last, so larger tubes will stay cool longer than smaller ones.
With an appropriate sized cap and PVC cement, seal one end of the tube. Follow directions on the cement for drying time, then fill the tube just over ¾ full (80 percent is about right) with salted water. The empty space allows expansion of the freezing water without breaking the tube. A mix of ½ cup salt per gallon of water will result in a solution just a bit more salty than seawater. It will freeze at about 28 F rather than 32 F.
Carefully seal the open end with cap and allow to the cement to cure with the tube standing upright so the water doesn’t reach the cement. Decorate the tubes anyway you see fit. Make them unique, because you want to keep track of your SUPER tubes. Once the cement is cured, put the tubes in your freezer, and they will be ready for your next outing.
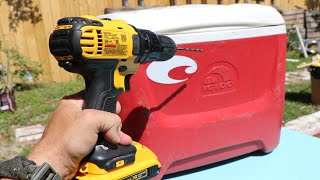
MAKE A GREAT GRIPPY BOTTOM
When you throw a normal cooler into the bed of a pickup truck or on the wet deck of a boat, it slides all over the place. It gets banged up and wrecks stuff around it. Heaven forbid, you should want to stand on it to get a better view of … whatever. A few large antiskid pads strategically placed on the bottom of the cooler quickly eliminate all those problems.
To ensure good adhesion to the plastic, if the surface is rough smooth with some sandpaper or emery cloth. Then use rubbing alcohol to clean off the places where you intend to attach the pads.
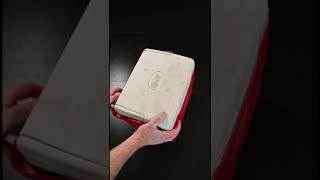
BUILD A FALSE BOTTOM BONANZA
Those Super Polar Bear tubes you made in Hack #1? Another great use for a couple of them is to support a false bottom in your cooler. That way if you use regular ice in addition to the tubes or any of the frozen food thaws, the run off drains to the bottom of the cooler but the contents stay high and dry above it.
Making a false bottom is so easy! Get a length of that white, coated wire shelf material. Cut it down so it fits in the bottom of the cooler. Zip tie two or three polar bear tubes between the wires and lay the system in the bottom of the cooler. Voila! You’re done. No more nasty melt water and whoknowswhatelse slurry contaminating your camping food.
WORLD’S MOST IMPORTANT COOLER HACK
The best thing you can do to preserve ice and keep everything colder is put an added layer of insulation at the top. A couple of custom cut pieces of foam insulation work well, but even better is a flexible foam pad (like the backing on mouse pad) that can lay over the top. Then when you open the cooler you lift up only the end of the pad you need to access what you’re after.
The more insulation, the better. Take whatever material you decide to use for your cooler pad and cut to size so it fits snugly just at the top of the cooler. If you go for two layers, cut the inner layer in half and glue it to the single top layer. This makes a “hinged” lid so you only expose half the contents to that nasty warm air when you open it.
For more tips, tricks, recipes, gear reviews and more visit us at: http://www.50Campfires.com
Don't forget to check out the 50 Campfires :
Daily Outdoor Podcast: http://bit.ly/dailyoutdoor
We'd love to have you join us over on Facebook as well: / 50campfires
Our monthly digital magazine is free!
Claim your subscription here: http://bit.ly/50CFMag